Windows Server Backup in Windows Server 2016
Windows Server Backup (WSB) is built in backup utility in Windows Server 2016/2012 R2/2012/2008 R2/2008. It has a series of wizards that helps you to create basic backups and perform recovery tasks whenever you need. The new Windows Server 2016 has the potential to be problematic, so it is rather crucial for creating a system image backup windows Server 2016. You can use WSB to perform a full server backup (including all volumes), specified volumes or partitions backup, system state backup, or specific files or folders backup. Since Windows Server 2012, WSB supports 4K sector advanced format hard drive and partitions larger than 2TB, so you can create a full server backup more easily. If something bad like hard disk failures, system crushes, happens, you can run a bare metal recovery to make everything back on track without worrying about data loss.
Create a system image backup in Windows 2016 with WSB
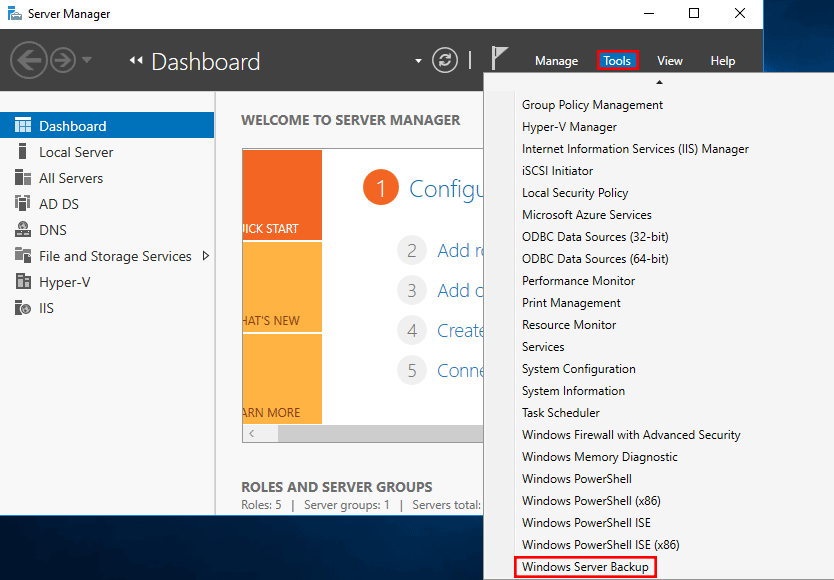
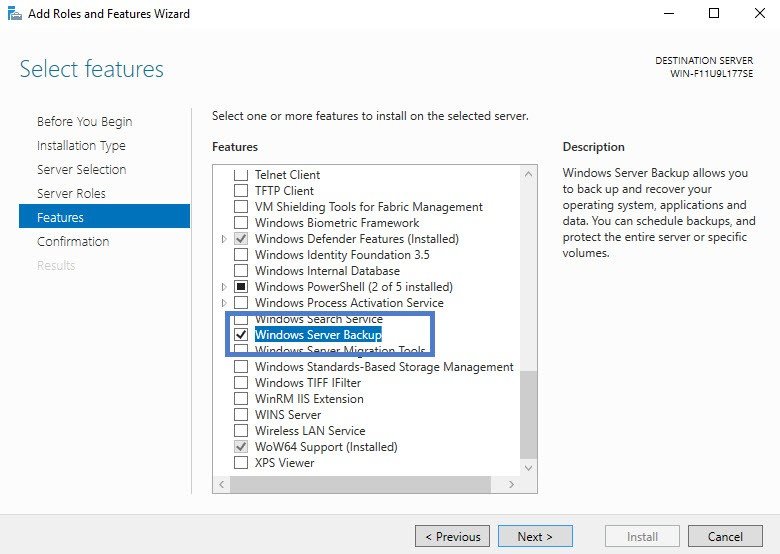
Before you can use Windows Server Backup, you need to install it first. You can go to Server Manager\Role-based or Feature based installation\Server, under the Features Wizard tab, check the Windows Server Backup Feature, and click Install. When you complete the installation, which won’t take long, you can click Start, Administrative Tools, and then select Windows Server Backup.
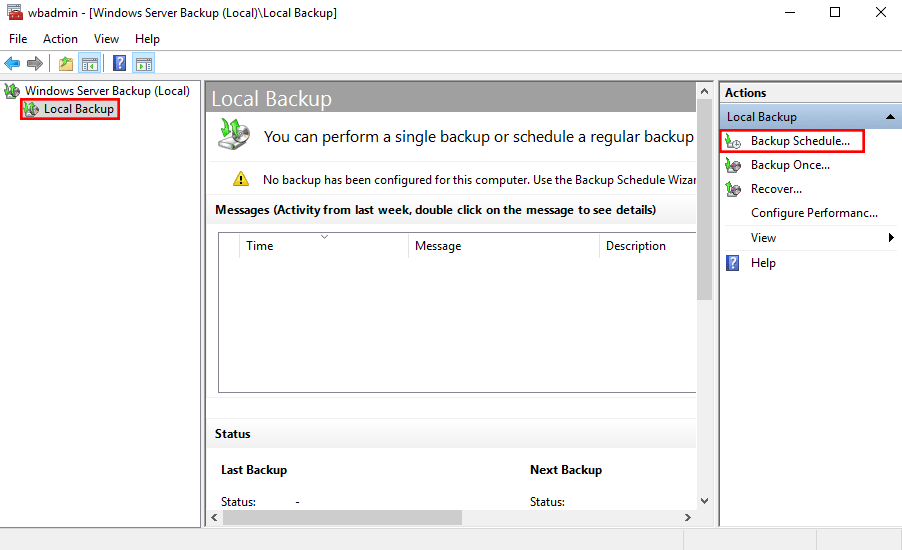
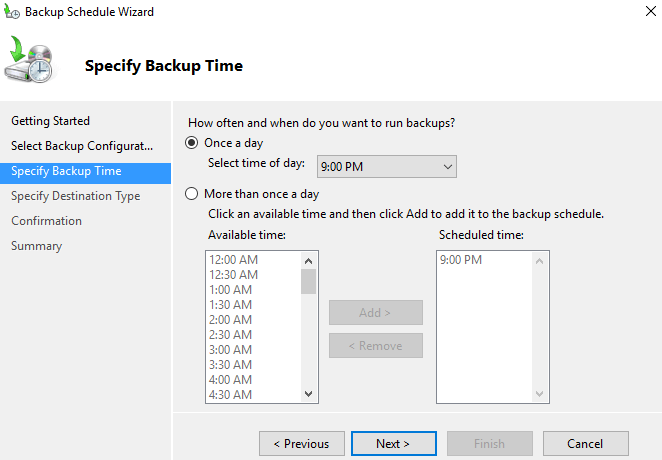
1. Under Action tab, click Backup Once for a one time backup job, and click Next to continue in the Backup Once Wizard. If you want to create a scheduled backup, click Backup Schedule instead.

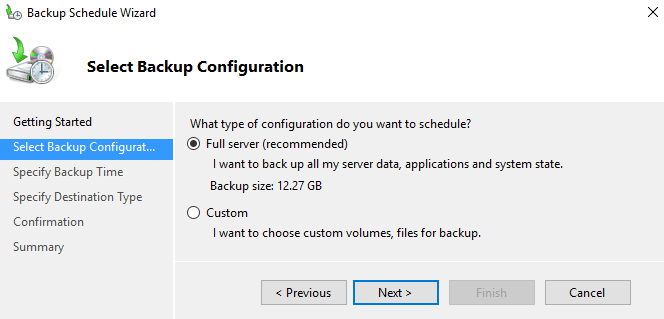
2. Check Custom for backup configuration and click Next.
3. Click Add Items option. In the next screen, check Bare metal recovery, which will automatically check the required items for bare metal recovery, and click OK.

4. Specify destination location to save the image backup, you can choose the local drives or remote shared folder.
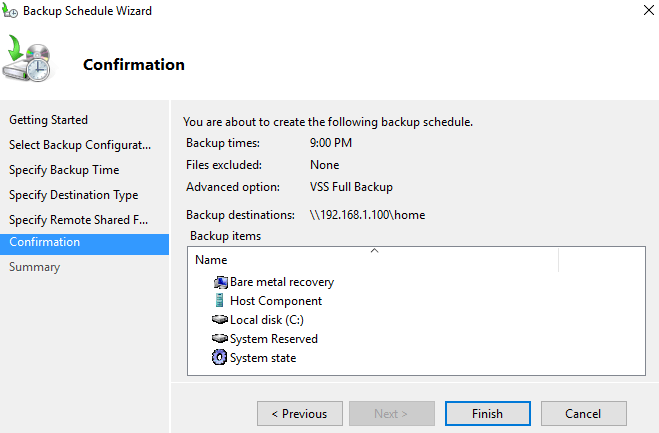
5. WSB will show you a confirmation screen. If no problems, click Backup to perform image backup for Windows Server 2016.

It will take a long while for the Windows Server image backup to complete. Once the backup is done, if you want to create another backup, you have to specify the destination to another location because new backup will overwrite the previous one on the same location. If what you created is a scheduled backup task, you can either modify the scheduled backup or delete it when you want to create a new scheduled backup. If you want to get rid of these restrictions, you can use the third party backup software.
Server 2016 system image backup with third party backup software
A powerful Windows Server backup tool, AOMEI Backupper Server allows you to perform system image backup with only mouse-clicking. It supports FAT32, FAT16, EXT2, EXT3 besides NTFS; it helps you to keep as many scheduled backups as you want instead one, and it can use any locations that File Explorer detects without removing previous backups. With its intuitive main interface, you can easily create an image backup.
1. Download, install and launch the Windows Server backup software.
2. Under “Backup” tab, select System Backup. As you can see from the screenshot, it provides 4 types of backup to meet users’ needs.

3. Click Step 2 to select a destination location to save the system backup as the program will automatically select the required partitions for a system backup. If you need to create a scheduled backup, just click the Schedule button and follow the instructions to configure a scheduled backup task before you click Start Backup. You can also configure full/incremental/differential backupsfrom there.

4. Click Start Backup to start the system image backup.

In a short while, AOMEI Backupper will create a system image backup in Windows Server 2016 for you. Once the backup task is finished, you can use it to restore to dissimilar hardware or identical hardware Server. With the ability to create bootable rescue media or AOMEI PXE Tool, you can easily restore your server even when it is unable to boot.
Windows Server 2016 – Three Built-in Tools To Protect Your Data From Ransomware
Windows Server 2016 – Three Built-in Tools To Protect Your Data From Ransomware
After spyware and malware IT administrators do have to face another threat – A Ransomware. You have to pay to recover your data that has been encrypted by malware. Clever move from the Pirate’s perspective. Indeed. Pirates are hoping that they can make some dirty money out of it. And sometimes they’re successful. You might be asking what can you do, as a system administrator, to protect yourself against ransomware?
Hackers will always find a way to your data and Anti-malware solutions will always try a way to block them. But you as an admin, must be prepared for an eventual data loss. Prepared how? We’ll try to find some strategies and tools which might be good to know. The tools that are built-in Windows Server 2016 that will be out later this year. Currently in TP5, but there won’t be any major updates on features further down the development cycle so the RTM of Windows Server 2016 shall have all what you can see in the TP5 which is available for download since about a week. We try to do a recap on which tools can be helpful to fight ransomware today.
The data you’re protecting might or might not be stored on Windows system volume. I never do that, but in case the server has RDSH and stores by default the user’s profiles on the system volume, you should be fine. We’ll focus on Windows server system which stores data on another volume, in this post as most enterprises are having their file servers correctly configured and separate the user’s data from system volumes.
 |
StarWind HyperConverged Appliance is a turnkey, entirely software-defined hyperconverged platform purpose-built for intensive virtualization workloads. Bringing the desired performance and reducing downtime, the solution can be deployed by organizations with limited budgets and IT team resources. Also, it requires only one onsite node to deliver HA for your applications that makes the solution even more cost-efficient. |
Find out more about  StarWind HyperConverged Appliance StarWind HyperConverged Appliance
|
First thing which comes in mind is the fact that Windows Server does have some built-in tools which can be useful to know and use for defense.
First – System Restore Protection
You can activate a system protection, a kind of Time Machine for a volume that needs to be protected. However, you don’t always have a control when system restore point is created. It might be useful in case the attacker is able to get into the system and corrupt system values, modify registry keys, or damages system files so the system crashes and is unable to boot. This is a smart move, but does not protect the data itself.
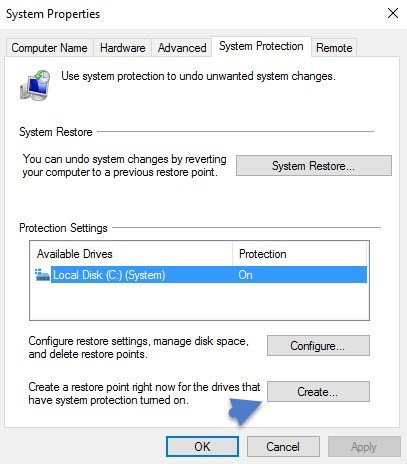
To activate system protection on Windows Server 2016:
Right click Start > System > Advanced System Settings > System Protection TAB
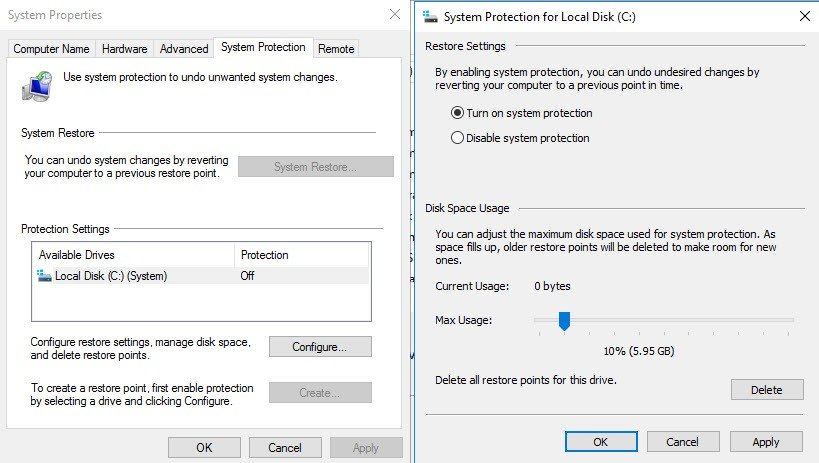
And then create a manual restore point immediately. You can do that after activation only, because otherwise, as you can see above, the button is grayed out
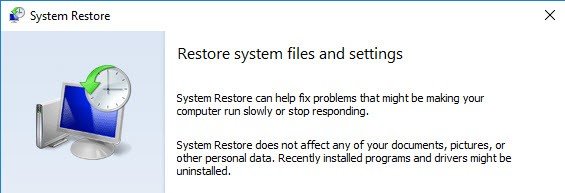
Now imagine that your system is corrupted and cannot boot. You can boot through Windows DVD and launch system restore from command line with:
“C:\Windows\System32\rstrui.exe”
Wizard based as well…
Second – System backup
By activating a scheduled backup you will be able to backup selected folders/files up to several times a day. Yes, Windows Server 2016 has still Windows backup feature. You need to add it via Add/remove Roles/features first…
Then find it through Windows Administrative tools > Windows Server Backup
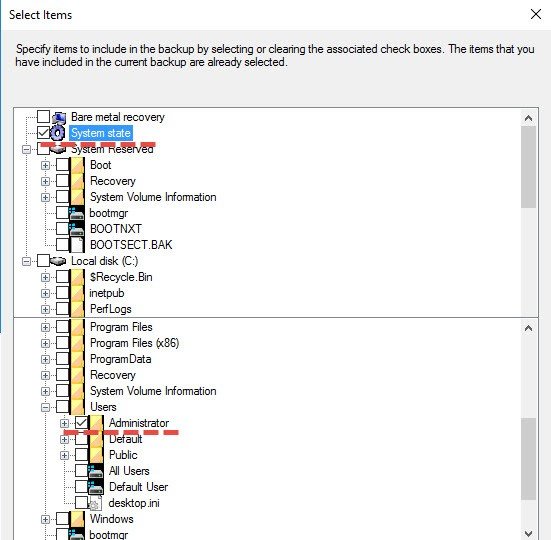
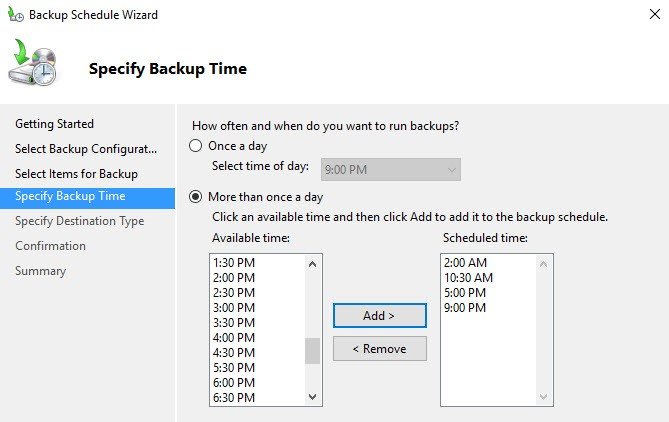
You can than create new Backup Schedule > Custom > Add
And you can select what you want to backup. It’s selective backup method where you can pick any folders, user’s profiles, system state ……
Scheduling several backups a day allows to lower RPO, but needs more storage space for those backups indeed.
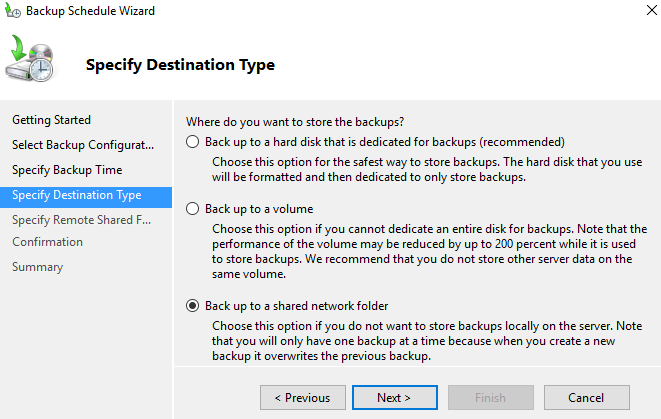
You can backup to:
- dedicated hard drive (nothing else can reside on the disk. It’s formatted by the software, before storing any backups, and then it’s invisible through Windows explorer)
- Backup to a volume – less performant, but you can store something else than backups
- Network share – backups are sent to a network share, which can be a NAS located in another room or building. (note that only single backup is kept as the software erases the previous backup with the new backup … kind of silly).
Image below shows Backup to a volume
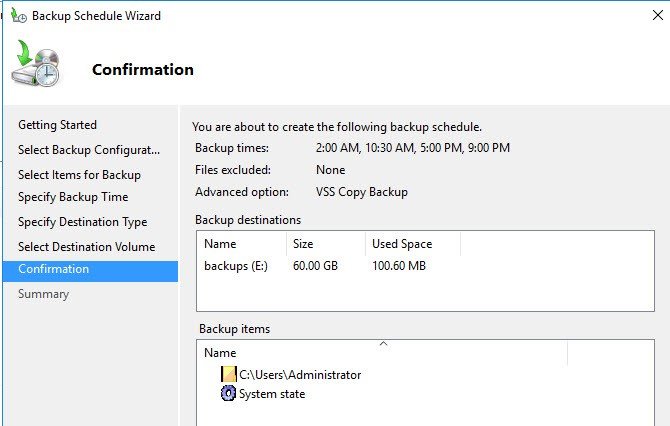
The solution is rather rudimentary. You don’t have any possibility to configure e-mail reporting either so the only way to check If the backup went fine is to login into the console and check manually.
Here I could recommend Free tool – Veeam Endpoint Backup which can in it’s latest version 1.5 sent e-mail after backup, and also it can disconnect an USB drive (if setup as a backup target) after backup. This can further prevent cryptolocker or other ransomware to encrypt your backups if you’re hit by the thread after backup being successfully done.
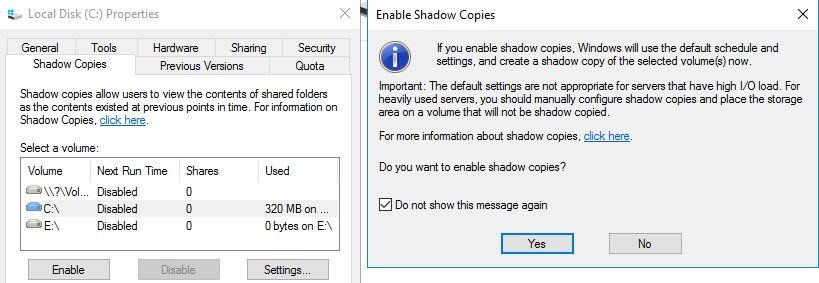
Third – Activate Shadow Copies
By activating shadow copies on a volume, with a scheduling, you’re basically activate a versioning. It means that users can restore files backed previously by VSS, at the volume level.
Where to activate? At the volume level. If your volume where you storing user’s files is E: then simply Right click the D: drive > Properties > Shadow copies > Enable
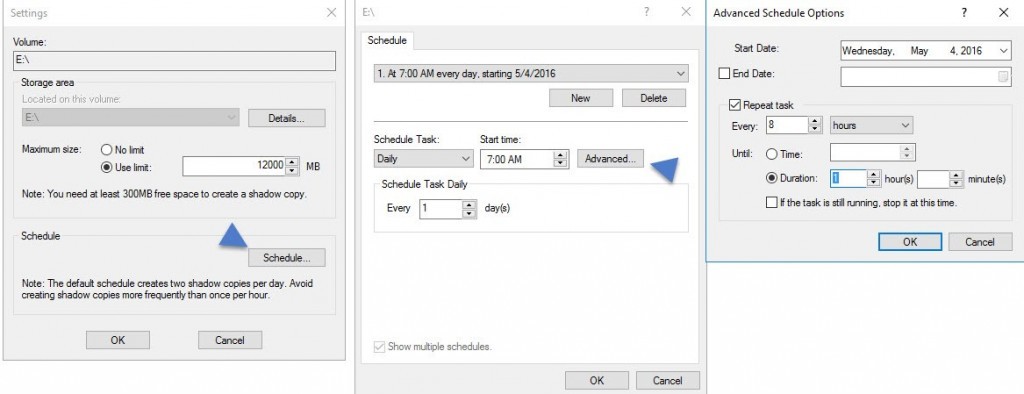
Then you go and click the Settings button where you can further configure the options, with an Advanced settings as well…
Once you have several copies (you can verify the snapshots in the Previous versions tab) you and your users are able to recover previous versions of a file, in case this one has been encrypted by a ransomware software. This stays however an individual approach only as you have to requests individually a previous version for each file that you want to recover.
If you have the whole volume encrypted by a ransomware, then you have to go to the Shadow copiestab > select a point in time before the corruption > click Revert button.
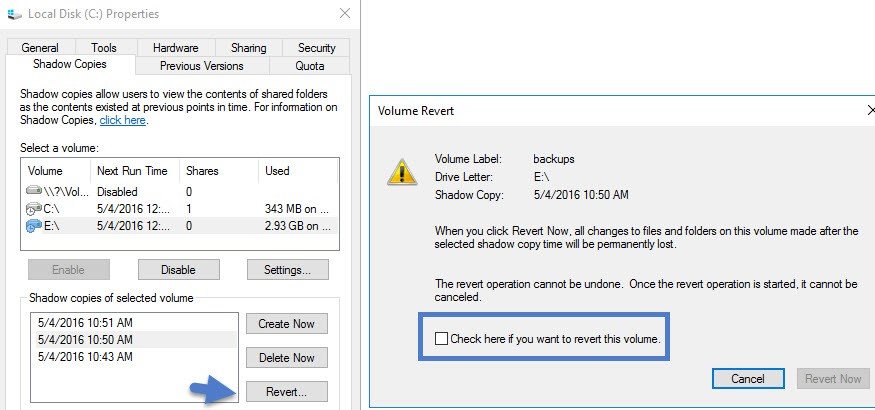
Note that this operation is permanent. You cannot go back. All changes to files and folders on this volume made after the selected shadow copy time will be permanently lost.
Wrap up:
Windows Server 2016 by itself has several built-in tools which are useful when protecting yourself against data corruption. Coupled to an up-to-date antivirus/antimalware software which is also present on Windows Server 2016 as Windows Defender, then you can fight data corruption quite successfully.
If you’re not familiar with those concepts and don’t want to alter users’ data I’d suggest to setup a lab environment with VMware Player, Workstation or Free version of ESXi. All those products would allow you to test those features before going into production environment.